How to buy MATIC on MetaMask – 3 Stress-free methods
This article explains exactly how you can buy Matic on Metamask. You’ll also learn how to add the Polygon network to your wallet, purchase some MATIC on Coinbase, and more.
If you’re just getting started with NFTs, you’ll undoubtedly come across projects running on L2 platforms like Arbitrum and Polygon. As far as Ethereum Layer 2 platforms go, Polygon is a competitor, offering lower gas fees and faster network speed. As such, tons of NFT projects have been launched on the network, providing new and experienced collectors with a cheaper way to get their hands on profitable projects.
If you’re looking to buy Polygon NFTs, you first need to get some MATIC, its native token. Several exchanges sell Matic, such as Crypto.com, Binance, Coinbase Pro, and 1inch Exchange. However, it’s a different ball game if you want to buy MATIC on MetaMask.
Keep reading to find out how you can buy and send Matic to Metamask with ease.
What are the different ways to buy MATIC on MetaMask?
There are three ways to buy Matic on Metamask:
- You can buy directly from your wallet through Transak (select countries)
- Swap another token in your wallet for Matic through a decentralized exchange.
- Buy some Matic from an exchange like Coinbase and transfer it to your Metamask address.
I’ll cover both processes below, but first, you need to add the Polygon network to your Metamask.
How to add Polygon network to MetaMask
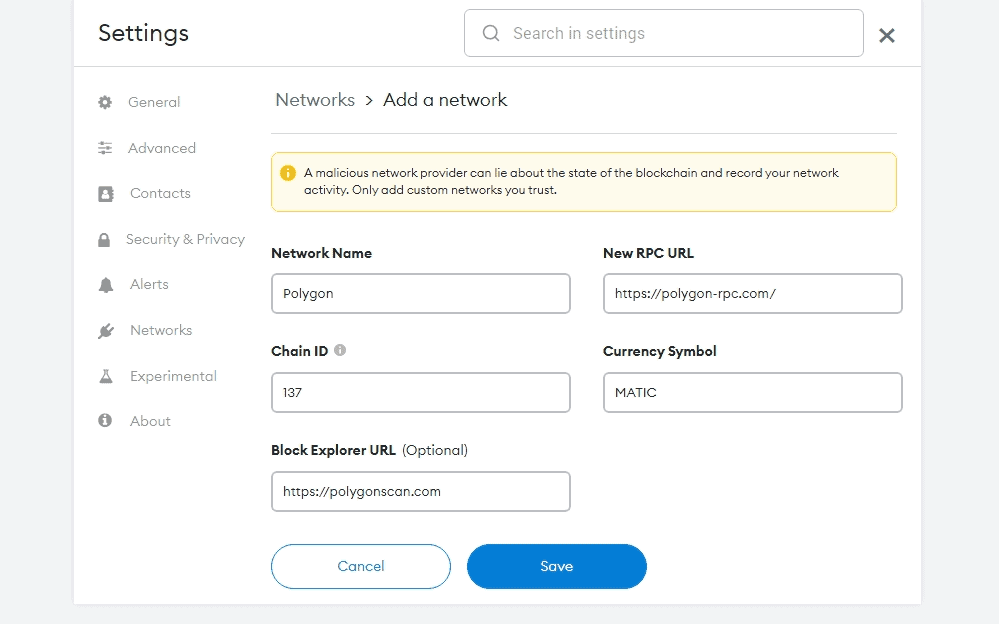
Before you can buy Matic on Metamask, you have to add the Matic mainnet rpc to your wallet. If you don’t have a Metamask wallet yet, our article on setting up a Metamask Wallet can guide you. Once you’ve done that, follow the steps below to set up Matic on your metamask.
- Launch your metamask wallet, then click the icon with Ethereum main net inscription to drop down the options.
- Scroll to the bottom of the dropdown list and click on Custom RPC.
- Add the Matic mainnet rpc to your wallet using the details below.
- Network name: Polygon
- New RPC URL: https://polygon-rpc.com/
- Chain ID: 137
- Currency symbol: MATIC
- Block Explorer URL: https://polygonscan.com/
- Click on the icon “save” to authenticate the settings.
How to buy MATIC on MetaMask using Transak
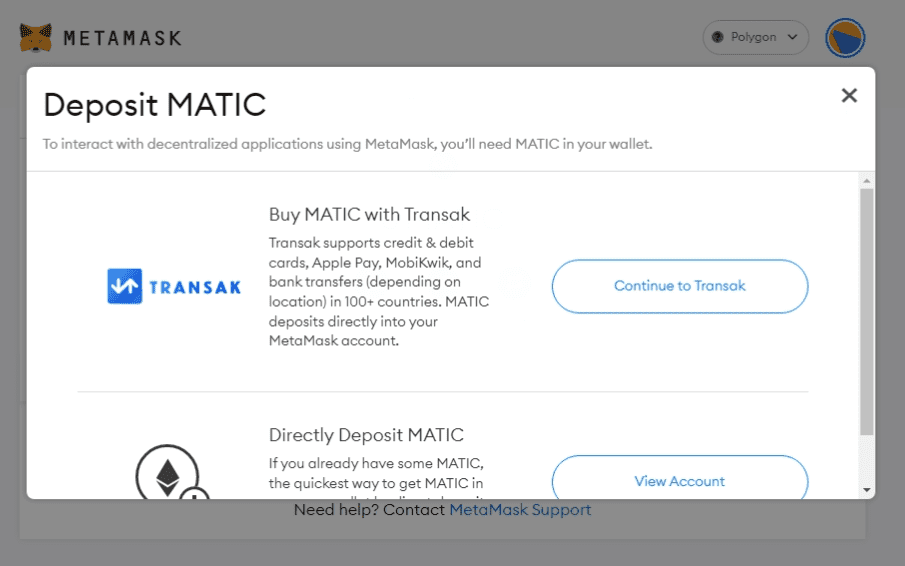
Metamask allows you to buy Matic directly in your wallet, thanks to their partnership with Transak. This is only available to select countries. Check their website to see Transak-supported countries. How to initiate the transaction?
- Open your Metamask wallet and change your network to Polygon.
- Click on the Buy button and select Transak. You’ll be redirected to a new page to complete your transaction.
- Enter the amount you want to purchase in your local currency, choose a payment method and click Buy Now.
- Confirm your order details, such as the wallet address, Transak and Metamask fees, and the amount of Matic you’ll receive, then click on the Buy Matic button.
- The next step is to enter your email address. Transak will send a verification code to your mail. Enter the code in the allotted space and continue.
- If you’re using Transak for the first time, you have to complete the 4-Step KYC process.
- Once completed, you’ll be prompted to enter your card details to purchase your tokens. Fill in the details and click on the complete transaction button. Your funds will appear in your account within the allotted time as stipulated in the transaction.
How to buy MATIC on MetaMask using Uniswap
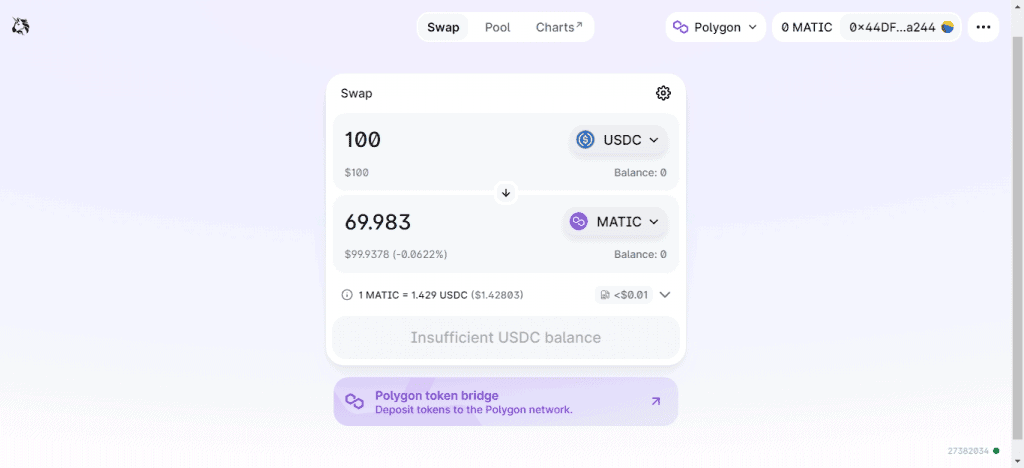
You can also do this with any DEX you’re comfortable with. The process is usually the same. Ensure you have some ERC tokens on your wallet like ETH, USDT, BNB, etc.
- Head over to app.uniswap.org
- Connect your Metamask wallet to the website by clicking the pink “connect wallet” button on the top-right.
- Grant the website permission to access your wallet and click next.
- If it’s on Polygon, switch your network to Ethereum mainnet since Uniswap runs on the Ethereum blockchain. You can always change it back to Polygon to view your transaction.
- Choose the token you want to swap for Matic on the top box. Then, on the bottom, select Matic. You’ll see the dollar equivalent of your transaction at the bottom left corner of each box.
- Review your transaction and click on “Swap” to complete the process.
Your Matic tokens should appear in your wallet automatically. Check your wallet to ensure the transaction was successful. Ensure you test the feature out by swapping a small amount first to reduce your chances of losing funds.
How To Transfer MATIC From Coinbase To MetaMask
Transfering your matic from coinbase to metamask is super easy. You can complete the entire process in just five steps. Here’s how to move your tokens to metamask from coinbase.
- If you don’t have a coinbase account yet, visit coinbase.com/signup to open one. The process takes about 5 minutes.
- Once done, click on the button labeled Buy/Sell on the top-right corner if you’re on the web version or the blue Buy button on the mobile app’s Home tab.
- Search for MATIC, click on it and enter the amount you want to buy. This can be in Matic or your local currency. The minimum amount you can buy is 2MATIC or $2.
- Click on the Preview Buy button to review and confirm your transaction. You can tap the back button at any time to make a change.
- Tap the Buy Now button to complete your chance once you’ve confirmed that the details are correct.
- Next, open your Metamask wallet and select the Polygon network from the drop-down on the upper-right of the page.
- Copy the wallet address to your clipboard. Since every token has its address, you don’t want to be sending your Matic to your Bitcoin address. You’ll definitely lose your funds. So make sure you’re sending Matic to the Matic address.
- Go back to your Coinbase account and click on Pay or Send/Receive.
- Choose Matic as your asset and enter the amount you want to send. Click Continue and crosscheck your transaction details.
- Paste the address and confirm that it matches what’s on your Metamask wallet. Review your transaction and click on the Complete button to finish the process.
As a rule of thumb, always send a small amount first to check that the process works perfectly and you didn’t miss anything like the wallet address. The transaction might take some time to process, depending on how congested MetaMask or Coinbase may be, especially during peak hours.

